Tuesday, March 29, 2011

Delight of the Week - Heavenly Angel Food Cake

Angel Cake

Scott and I have been enjoying some pretty heavy desserts lately so I decided to make one of my favorite light desserts for this week's Delight of the Week. It turns out that this might be one of Scott's favorite desserts. That or he was quite hungry when he gobbled up three slices in one night!

Angelfood Cake

When making Angel Food Cake, it is important to have fresh egg whites. The older your eggs, the less the cake will rise which still results in a tasty cake, just a shorter one at that. Angel Food Cake is actually pretty simple to make and a snap if you have a stand mixer. I served ours with a Raspberry Sauce but be creative and top your cake with dulce du leche, whipped cream, chocolate sauce or really anything you want.

Raspberry Angelfood Cake

Heavenly Angel Food Cake
Adapted from How to Cook Everything by Mark Bittman

Ingredients
1 cup cake flour, sifted
1 1/2 cups fine sugar
9 egg whites
1/4 teaspoon salt
1 teaspoon cream of tartar
1 teaspoon vanilla extract
1/4 teaspoon almond extract

Directions
1. Preheat the oven to 325F. Take out your un-greased 10-inch tube pan and set aside.

2. Sift together the flour and 1/2 cup of sugar. Repeat once more.

3. Beat the egg whites until foamy. Add the salt and cream of tartar. Continue to beat until you have soft peaks. Beat in the remaining sugar and extracts. Continue to beat until the peaks are almost stiff.

4. Gradually fold in the flour mixture. Be gentle here. Turn the batter into your 10-inch tube pan and bake for 45 minutes or until the cake is firm and nicely browned.

5. Invert the cake onto a rack and let cool for about an hour. Using a knife, carefully cut around the sides of the cake and remove. Serve with Raspberry Sauce (recipe follows)

Rasberry Sauce in Copper Pan

Raspberry Sauce

Ingredients
1/4 cup water
1/2 cup sugar
3 Tablespoons butter
2 cups frozen raspberries (really any berry would work here)

Directions
1. Combine water, sugar, butter and berries in a medium saucepan. Cook over medium-high heat until the mixture is thick and syrupy.

2. Reduce heat to low and simmer for about 2 minutes until berries are completely broken down. Serve warm or at room temperature over Heavenly Angel Food Cake.
Thursday, March 24, 2011

Bakesale for Japan


A nationwide Bakesale for Japan is being held and here in Seattle it will be at the Cakespy Shop. The organizers are looking for “bakers, artists, volunteers, and lots and lots of customers”, if you think you can help you can find more details here. I'll be there and hope to see many friendly faces for this great cause.
Tuesday, March 22, 2011

Delight of the Week - Peanut Caramel Jar Budino

Bundido 3

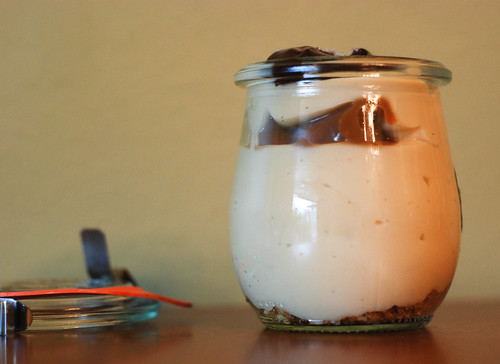
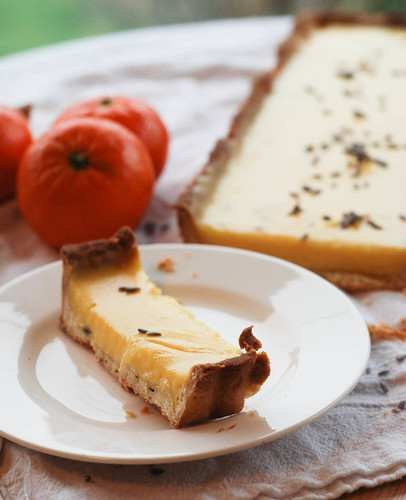
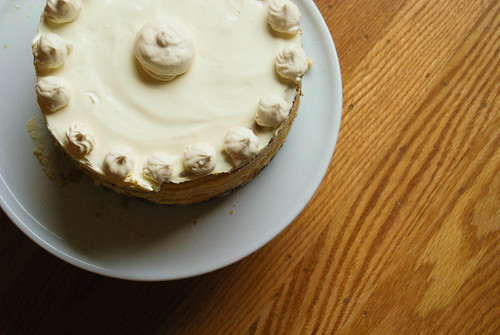
The Peanut Carmel Jar Budino perfectly layers the delightful flavors of a Snicker's bar with everyone's favorite, pudding! This is the ideal treat to curl up on the couch with or sneak a few bites of at midnight. Remember Budino just means pudding in Italian!

Bundido 2

I served this as dessert to my parents who practically licked the jars clean. My husband asked about this dessert for days after eating it.

Bundido

Peanut Caramel Jar Budino
Serves 4
Adapted from Food 52
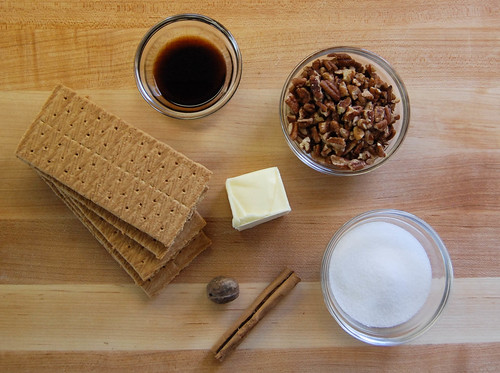
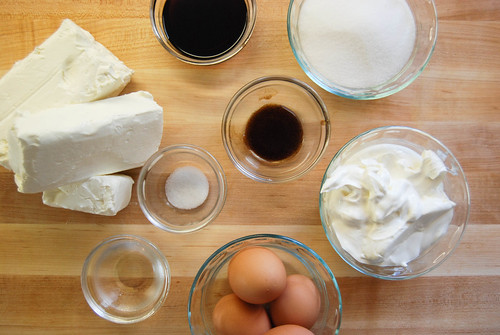
Ingredients

2 Tablespoons Honey
1/2 cup packed dark brown sugar
1 1/2 tablespoons Kosher Salt
1/4 cup water
2 1/2 cups Half & Half
1 large egg
2 egg yolks
3 tablespoons Cornstarch
1 teaspoon vanilla paste
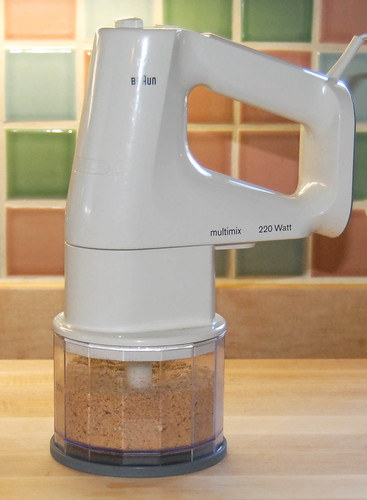
1/4 cup finely chopped hazelnuts
1/4 cup graham cracker crumbs
2 tablespoons unsalted butter
1/2 cup dulce du leche (pre-made or use this recipe)
1/2 cup dark chocolate ganache (recipe follows)

Directions

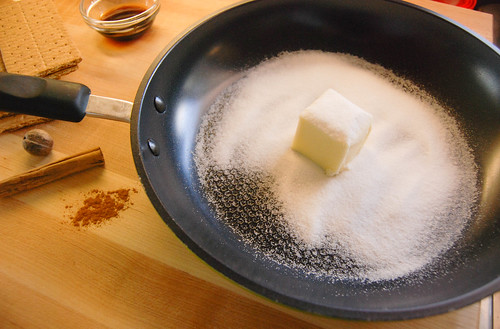
1. In a saucepan, whisk together honey, sugar, water and salt.

2. Bring to a boil, stir occasionally before lowering to a simmer. Simmer for approximately 5 minutes until it thickens.

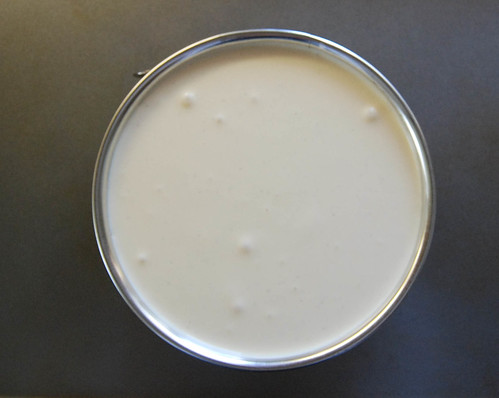
3. Remove from heat and add half and half while whisking the mixture.

4. In a separate bowl, whisk together eggs, egg yolks and cornstarch.

5. Add the half & half mixture to the egg mixture in a slow continuous stream. Keep whisking!

6. Strain the custard through a fine mesh sieve back into the sauce pan. Put the sauce pan on medium heat and start whisking.

7. Keep whisking, until the custard starts to thicken and bubble. This will take some time so keep whisking.

8. Remove from heat and strain through a fine mesh sieve into a small bowl. Set the bowl into a bowl of ice to cool.

9. Melt butter in a saute pan and add nuts and crumbs. Saute the nuts and crumbs until they are toasted.

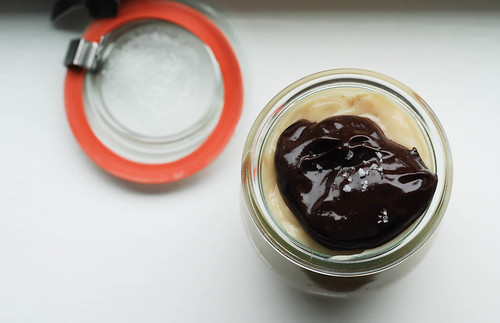
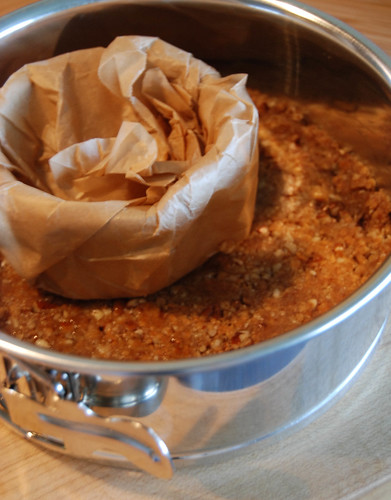
10. Time to assemble the budino. I used Weck jars but you can assemble these in any type of jar, glass or bowl. Add a tablespoon of the nut and crumb mixture to the bottom. Fill the jar halfway with the cooled custard. Add two tablespoons of Dulce de Leche to the jars before adding more cooled custard. Top with a tablespoon of dark chocolate ganache and sprinkle with fleur de sel.

11. Let the assembled budino cool in the fridge for at least 2 hours, preferably overnight.

Dark Chocolate Ganache

Ingredients

1/2 cup chopped dark chocolate
1/4 cup half & half
1 tablespoon unsalted butter
1 pinch kosher salt

Directions

1. Bring half & half, butter and salt to a simmer in a saucepan.

2. Add dark chocolate and whisk until smooth. The ganache will thicken as it cools.
Friday, March 18, 2011

Spring Gardening Dreams

Plants on the Kitchen Windowsill

I received Apartment Gardening: Plants, Projects, and Recipes for Growing Food in Your Urban Home in the mail this week and quickly dove into it. The weather outside isn't quite ready for gardening so I decided to take some of Amy's ideas inside. I now have three lovely herbs growing on my kitchen windowsill. And a hunger to start gardening outside.

As with Amy's previous book, Urban Pantry: Tips and Recipes for a Thrifty, Sustainable and Seasonal Kitchen, her newest book is FULL of great ideas, knowledge and some recipes. I highly recommend this book to apartment dwellers and non-apartment dwellers alike. I may have a big yard in which to garden but a lot of Amy's ideas are perfect both a big space and a smaller space.

Now if only the weather could warm up a bit and dry out a lot, then I could dig my hands into the dirt and start gardening outside! Until then, my kitchen herbs should keep me happy and content.

What are your Spring gardening plans?

Wednesday, March 16, 2011

The Wednesday Links from Around The Web 3.16.11 Edition

Cute dog in wee cast

I'm making pillows for my couch and I love all of these!

Piano Pillows

Cross Pillows

Modern Pillows

Not So Traditional Log Cabin Pillow

I think this Meyer Lemon Cake would help me craft even faster!

After reading this blog, I might be back on a jam kick. Making Joy out of Jams

Inspiration for a Delight of the Week!
Valencian Orange Tart


Because free is also nicer than paid. Font Squirrel - Free Fonts
Tuesday, March 15, 2011

Delight of the Week - Crafterday Orange Lavender Tart

Orange Lavender Tart 1

Once a month, I have a few friends over for Crafterday. We sew in my craft cave, chat about all of our crafting plans and rave about our successes. I like to provide treats to keep our Crafterday energies up. This tart was a delightful way to celebrate Crafterday with it's citrus-y flavor and lavender scented crust.

Orange Tart

This past weekend, I decided to make an Orange Lavender Tart. Coincidentally, Food52 was holding a contest for the best "Late Winter Tart" and so after crafting up this treat, I also decided to enter it into the contest. You can find my entry here: http://www.food52.com/recipes/10337_orange_lavender_tart


Thursday, March 10, 2011

Mystery Socks

Mystery Socks

Back in 2009, I had a harebrained idea to knit 12 pairs of socks - one for each month. As the year progressed, I began to lose my excitement for the sock project and slogged through some socks. One pair got left by the wayside.

Mystery Socks 5

In October 2009, I started the Mystery Socks. The basic premise is that instructions are mailed to you every week. You knit according to the instructions and by the end of a few weeks, you have a pair of socks! The mystery part is that you have no idea what your socks are going to look like.

Mystery Socks 3

I thought for sure this would help lift me out of my sock induced knitting depression. It did not. I LOVE this pattern and I love that after almost two years, I've FINALLY finished these socks. However, the pattern did not help me find my sock love. Nothing was going to help me find my sock love at that point in the game. So I did what any self respecting knitter would do, I took a break from sock knitting.

Mystery Socks 2

Last week though I found my sock mojo and quickly finished the Mystery Socks. I love them. I can't wait to work on more socks now!
Tuesday, March 08, 2011

Delight of the Week - The Cheesecake Abides

Cheesecake 5

One of Scott's favorite movies is "The Big Lebowski" and last week he decided that it had been much too long since he had last seen it. I promised him that we'd watch it over the weekend and that I'd craft up a treat suitable for The Dude.

The Dude Abides

I dug into a few cookbooks, found an old Kahlua brochure and crafted up a White Russian Cheesecake. I like to think that if The Dude actually did more than drink White Russians, he'd really dig this cheesecake.

Crust Ingredients

I decided that a caramel nut crust would be perfect to offset the cheesecake flavor. Adding a bit of Kahula to the crust helps keep the flavor through the entire dessert. In addition to the crushed graham crackers and pecans, a dusting of cinnamon and nutmeg is a delight.

Crust Crushing

I recommend crushing the graham crackers in a food processor with the nuts. It creates a more uniform crust. Add the spices to the cracker and nut mixture to really combine the flavors.

Crust Assembly

Once the butter and sugar are caramelized, add the crushed crackers and nuts. Heat until all ingredients are warmed.

Crust Forming

Wrap parchment paper around a small ramekin and use it to press the warmed crust into a 9-inch Springform pan. Since the crust is made in a skillet, there is no need to bake this crust.

Cheesecake Ingredients 2

Once the crust is made, the cheesecake can be created. It takes a lot of cream cheese to make a dense cheesecake. Density is important in a cheesecake. Make sure to really whip the cream cheese before adding the rest of the ingredients.

Cheesecake before Baking

Once the cheesecake is mixed, fill the springform pan being careful to leave at least 1 inch from the top of the pan.

Cheesecake after Baking

I did not follow my own advice and filled the pan almost to the top. The cheesecake puffed up a bit and almost over flowed the pan. Oops!

Once the cheesecake is baked, allow it to cool for 5-10 minutes before placing it in the fridge for at least 6 hours. We tried to dig into the cheesecake before it had fully chilled and really it wasn't as good as when we waited for it to fully chill.

Whipped Cream Ingredients

A brown sugar and bourbon cream topping really brought the cheesecake to life. Of course this meant an extra trip to the liquor store but it was worth it for this whipped cream topping. Also no need to buy the expensive bourbon for this, the cheap ones will work just fine once they are mixed with the remaining ingredients.

Cheesecake 5

The recipe follows after the jump.

Thursday, March 03, 2011

The Craft Cave

Craft Cave Mascot

In our new house, I have my very own craft cave. It's down in the basement so it can get a bit chilly but with a sweater and a quilt, it is a wonderful place to craft.

Craft Cave Fabrics

I have plenty of space to spread out which means the craft cave has gotten a bit messy in the past few months. I'm on an organizational kick though and this room is next on my list.

Craft Cave Rabbit

I also have a few projects that I need to finish up. I have enough blocks for three quilts. All I need to do is sew them together and get quilting!

Craft Cave Projects

I love my craft cave. It's a very good place to craft.

Craft Cave Inspiration
Tuesday, March 01, 2011

Delight of the Week - Spiced Pumpkin Bundt Cake

Bundt Cake3

In my eternal quest for the perfect dessert, I've decided to feature a new dessert every week. This week is the Spiced Pumpkin Bundt Cake, inspired by Martha Stewart herself.

Bundt Cake4

I've had an obsession with Bundt cakes ever since I flipped through Sarabeth's Bakery: From My Hands to Yours. She features many a beautiful Bundt cake which I hope to make one day soon. I've also had a can of Pumpkin Puree in the cupboard since November so I decided to combine both my desire for a Bundt cake with my love for pumpkin flavored desserts.

This cake is delicious! It came out moist, flavorful and beautiful. I think a scoop of rum flavored ice cream would be a wonderful accompaniment to this cake.

Bundt Cake2

Spiced Pumpkin Bundt Cake

Ingredients
Nonstick cooking spray
4 cups cake flour, plus more for dusting
4 teaspoons baking powder
1 teaspoon baking soda
1 teaspoon salt
3 tablespoons pumpkin spice
1 cup unsalted butter, room temperature
2 1/2 cups packed light-brown sugar
4 large eggs
1 cup buttermilk
1 cup canned pumpkin puree
Confectioners' sugar, for dusting

Directions

1. Preheat oven to 350 degrees. Lightly spray a Bundt pan (14-cup) with cooking spray. Dust with cake flour. Tap out the excess flour.

2. Sift together flour, baking powder, baking soda, salt, and pumpkin spice. Set aside.

3. Beat butter and brown sugar together in an electric mixer fitted with the paddle attachment, on medium speed until pale and fluffy. Add eggs, one at a time, beating well after each addition. Scrape down the sides of the bowl after each addition. Reduce speed to low and beat in flour mixture in 3 additions, alternating with buttermilk. Beat until just combined. Add pumpkin puree and beat until mixed. Pour batter into prepared Bundt cake pan.

4. Bake cake until golden, about 55 minutes. Use a wooden skewer, inserted into the center of the cake to check for done-ness. The skewer should come out clean. Cool on a wire rack for 30 minutes. Once cooled, carefully turn the cake onto the rack to completely cool. Dust with confectioners' sugar before serving.
 
Rebecca Mongrain's Blog © 2013.

Design by The Blog Boat